Stripe e-invoicing & fiscalization plugin (How to guide)
Stripe vs DDD Invoices comparison: Stripe invoices payments. DDD Invoices handles global e-invoicing compliance.
.webp&w=3840&q=75)
No manual work required after setup. DDD Invoices Stripe plugin allows businesses to comply e-invoicing & fiscalization requirements when invoicing or receiving payments with Stripe.
The Stripe plugin is available for install here.
Short introduction of the Stripe plugin:
We are currently onboarding businesses from Slovenia, Croatia, Romania, Italy, Montenegro, Serbia, Germany, all countries for PEPPOL e-invoicing etc. and soon also Greece, Hungary and other nations!
You will complete setup across two systems:
• Stripe (where invoices and tax settings are created)
• DDD Dashboard (where company, compliance, and delivery channels are configured)
What you need before you start:
Setup overview: 4 steps to make your Stripe transactions compliant:
1. Install the Plugin in Stripe
2. Verify Your Tax Settings in Stripe
3. Set-up company & delivery channels in DDD Dashboard
4. Choose a payment package & switch to production!
Prefer video?
Watch full setup walkthrough (20 min)
📍 Location: Stripe
Head to Stripe Marketplace or click this link to install the DDD Invoices plugin (you need a Stripe account): https:/
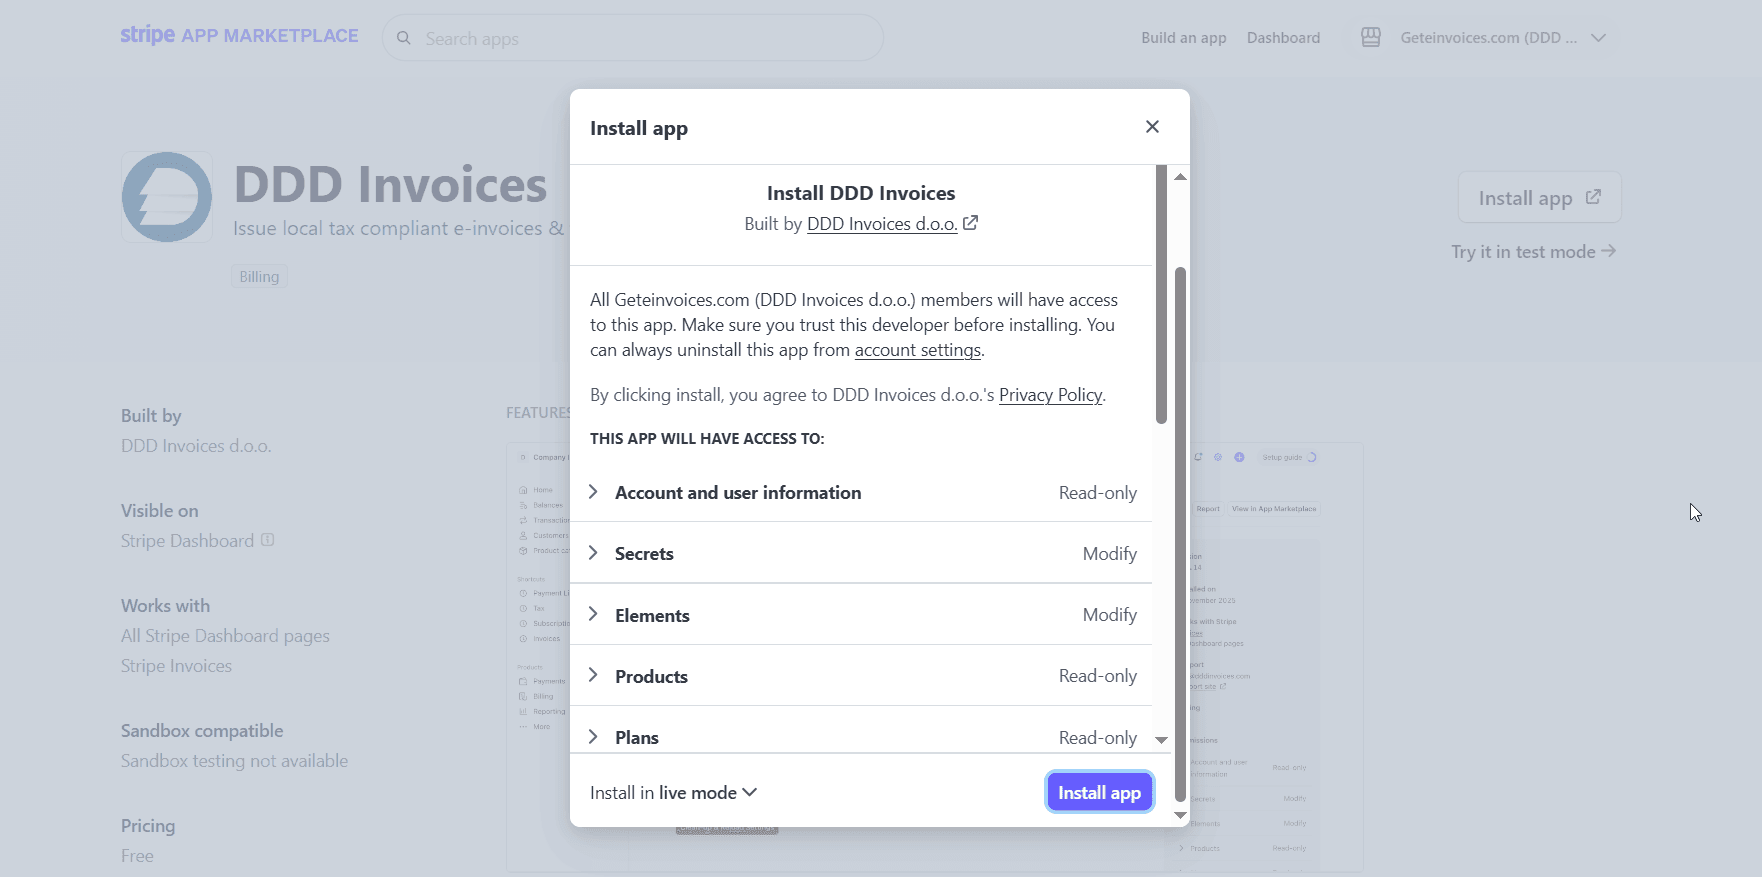
1/4: Open Stripe and click on the DDD Invoices plugin
.png&w=1920&q=75)
2/4: Insert you email and tax number and click Sign-In:
.png&w=3840&q=75)
3/4: Open Settings of the DDD plugin inside Stripe.
.png&w=1920&q=75)
4/4: Turn ON “Auto-processing of invoices” so every invoice/transaction/subscription is automatically sent to DDD Invoices.
.png&w=1920&q=75)
Extra step: Set up the workflow that you need for your use-case and country. Below is a video explainer of the steps you might need.
.png&w=1920&q=75)
Here is a country & use-case guide for steps workflows, that will tell you which combination of steps you need for your use-case.
Click SAVE (and watch for black confirmation box on the bottom)!

Before DDD can generate compliant invoices correctly, make sure your tax setup in Stripe is complete.
You need to check 3 places in Stripe:
📍 Location: Stripe. Check all 3:
These settings determine what tax information appears on your invoices and whether Stripe Tax can calculate tax correctly.
If you are VAT registered, make sure your tax registration is added in Stripe. If you are not VAT registered, or you are tax exempt, you can set this up using custom VAT rates or exemptions, as explained below in the section Custom VAT rates.
Once this is set correctly, Stripe Tax can calculate and apply taxes automatically.
1/3 Head to Stripe and write → Tax in the Stripe toolbar:

Click on Tax and go to Locations. Example:

Here, check:
In the Locations tab, you should confirm that your tax registration exists for the country where you issue invoices.
If you are already VAT/tax registered, your location should appear here with status Collecting tax.
If it is missing, click + Add registration and add your registration details.
Stripe uses this registration data to calculate and collect the taxes you are responsible for.
2/3 Write → Settings / Tax in the Stripe toolbar:

At the bottom, review how tax should be handled on your invoices and check that your tax setup matches the way you sell.
Then decide whether your prices should be treated as:
.png&w=1920&q=75)
In most cases:
This affects how Stripe calculates and displays tax on invoices.
Example:
Make sure this matches your pricing model, otherwise invoice totals may appear differently than expected.
If you use different pricing logic for different products, customers, or countries, review your Stripe setup carefully and make sure the selected tax behavior reflects your actual sales flow.
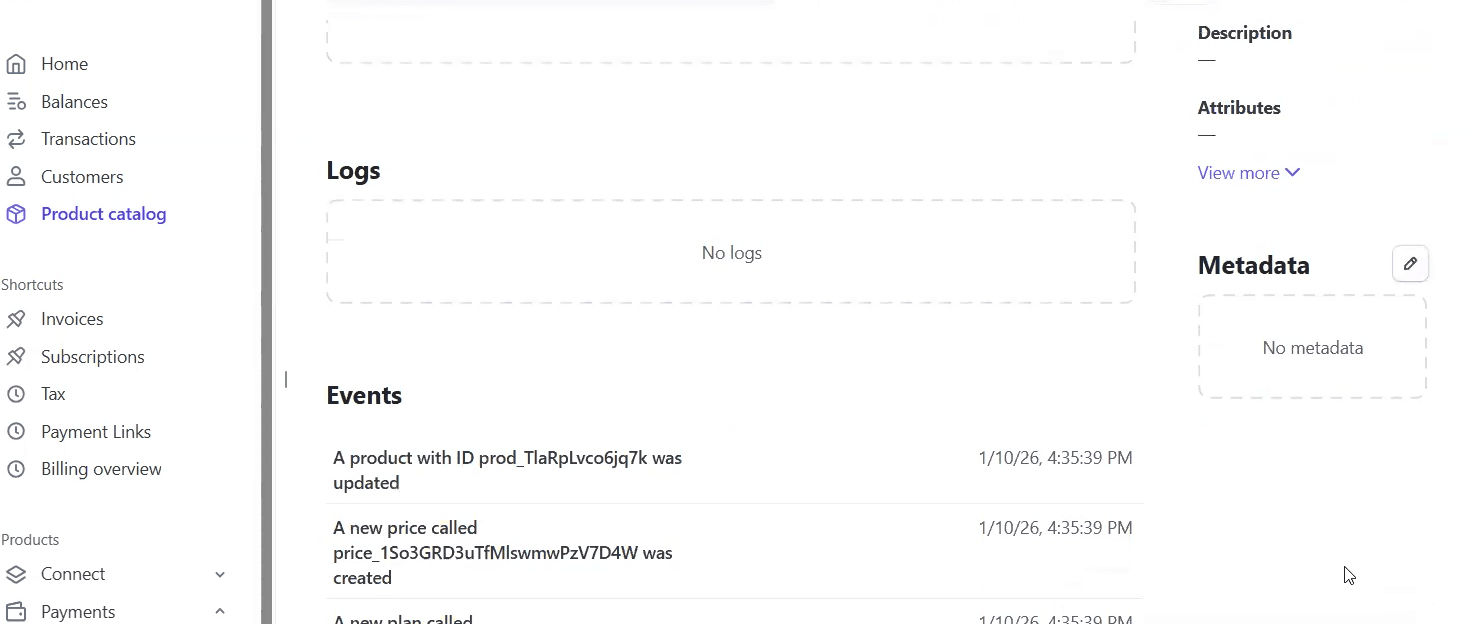
3/3 Open Product catalogue in Stripe and check how tax is applied to your products or subscriptions.
Write → Product catalogue / Tax in the Stripe toolbar:
-1.png&w=1920&q=75)
Here, make sure that your products use the correct tax setup:
If Stripe shows “You’ve activated Stripe Tax”, tax rates usually do not need to be created manually. In that case, make sure your tax settings and product setup are correct.
If you are using manual tax rates, confirm that the correct tax rate is added to the relevant product, subscription, or invoice flow.
This step is important because tax on invoices depends not only on your Stripe account settings, but also on how the specific product or subscription is configured.
If you do not use Stripe Tax, make sure the correct tax rates are added manually to the relevant products, subscriptions, or invoice flow.
This ensures the correct tax treatment appears on your invoices.
_____________________________________
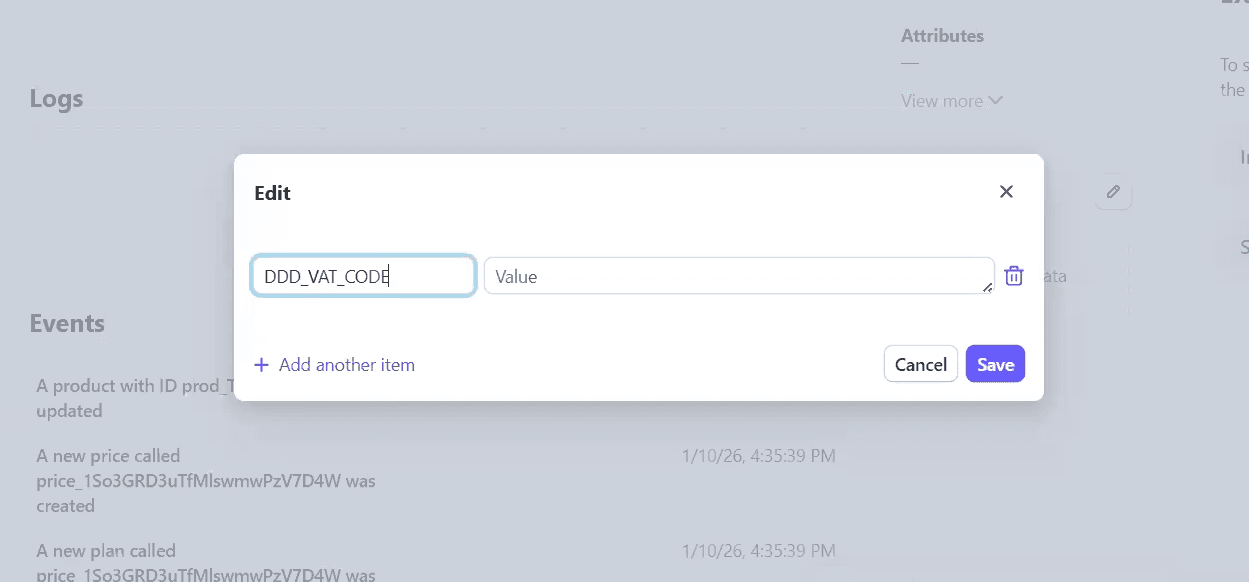
E-invoicing & fiscalization requires a reason for tax exemption.
If you send invoice with rate 0% VAT from Stripe , we will put on the invoice the most general VAT exemption code available. As e-invoices require specific code for the VAT, you cannot simply insert a 0% VAT without a specifed reason for exemption. For this reason, follow the Custom VAT rates guide bellow to specify what exemption code (and consequentally also exemption clause) you want on your invoices.
Here we can set-up the meta-data for the product if you are for example VAT exempt, or have transactions who require exemption handling, and want to have have extra VAT rates/clauses/codes not provided by Stripe. Here is a video about that.
Example of meta data in Stripe:
Click on specific product -> Meta data on the right side (image below) -> Insert in the field key "DDD_VAT_CODE" and insert in the field value correct code found in on this link (second image below). Here is a video to help you with that.
Now, go to your DDD dashboard.
_____________________________________
📍 Location: DDD Dashboard
What you will need: authentication credentials (certificates, API keys etc.) After this, DDD will be ready to process your invoices.
1/2 Click “Go to Dashboard” at the bottom of the DDD plugin in Stripe.
.png&w=1920&q=75)
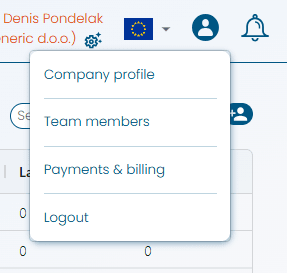
In the DDD Invoices dashboard → click the person icon (top-right corner).
.png&w=1920&q=75)
Fill in all Company Details (most of this data is required to be visible on the invoice) and click SAVE!
-1.png&w=1920&q=75)
2/2 In the DDD Dashboard on the left side, go to Settings → Delivery Channels.
Depending on the use-case and country you might need to set-up different Delivery Channels and insert authentication credentials (certificates, API keys etc.)
Click here for the guides for delivery channel set-up per country & use-case which will tell you how to obtain the authentication credentials.
-1.png&w=1920&q=75)
Result:
DDD is now ready to process your invoices.
Before booking, make sure your Stripe account is fully verified & set-up.
📍 Location: Stripe
Unlimited testing before going live: Test sending invoices from Stripe to the test tax authority portal and you’ll be using DDD’s test authentication with the tax portal. Important: Only paid invoices are sent to DDD.
1/4 Go to Stripe and click on Invoices Tab and try sending an invoice, subscription, payment link with a small amount!
-1.png&w=1920&q=75)
2/4 Click on one invoice to view the status of that specific invoice! In order for the invoice to get sent to our service the invoice in Stripe should have the status "paid".
-1.png&w=1920&q=75)
3/4 A successful test means that all Steps selected in the plugin Settings page were executed.
.png&w=1920&q=75)
4/4 See all your invoices:
📍 Location: DDD Invoices
By going to the DDD Invoices dashboard on the LEFT sidebar menu is Invoice Flow Control → Issued Invoices you can see your whole invoice flow of all your invoices.
-1.png&w=1920&q=75)
Success! Your invoice has been validated and sent according to local compliance rules.
_____________________________________
1/4 In the right corner menu click on the "person" icon and click on Payments & Billing
A payments and billing section will open, where you can see your uploaded credit amount, payment plans invoices and more.
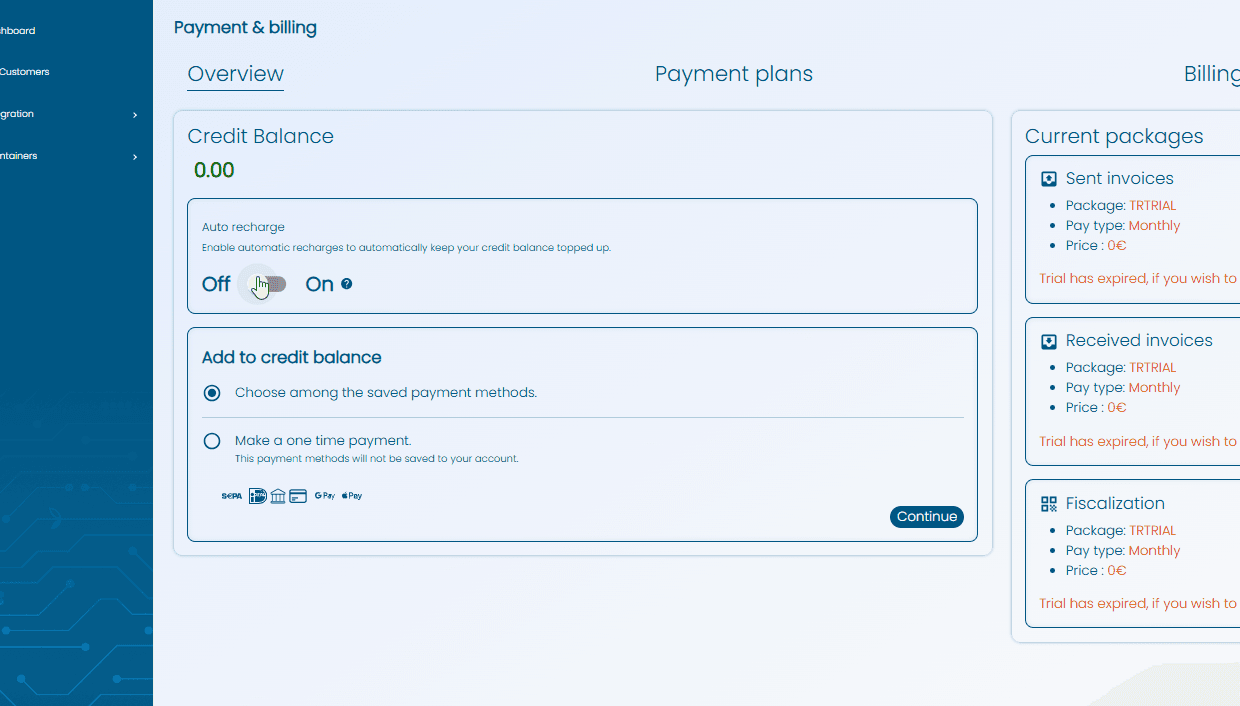
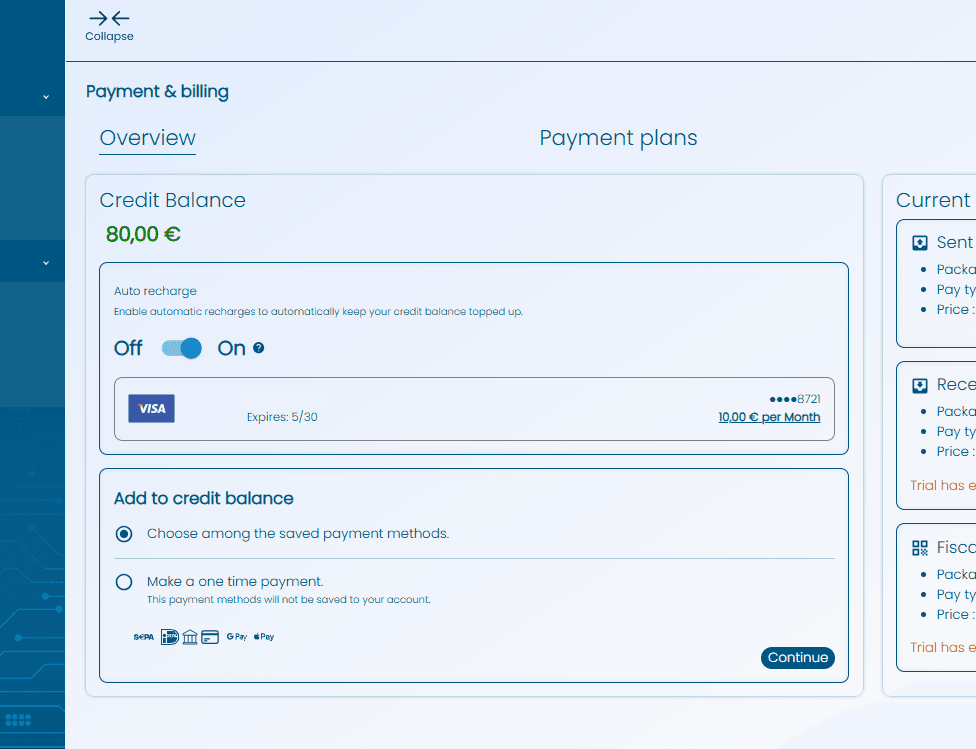
2/4 Click on the Auto-recharge option to always keep you account topped up and enter the amount that is the same or slightly higher then the package price, to account for invoices going over the limit.
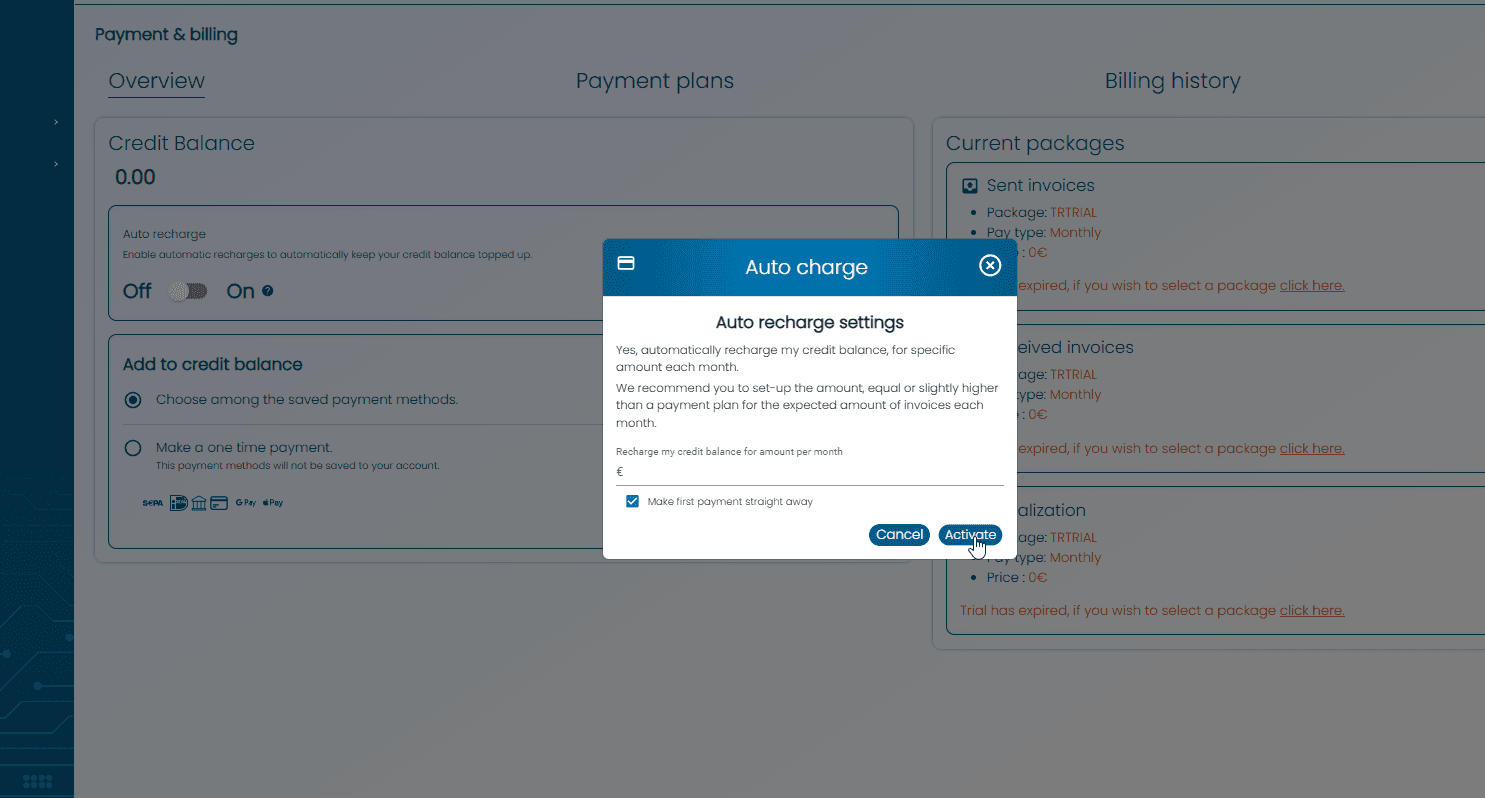
3/4 Complete the purchase and the card together with the payment plan should be saved in the dashboard.
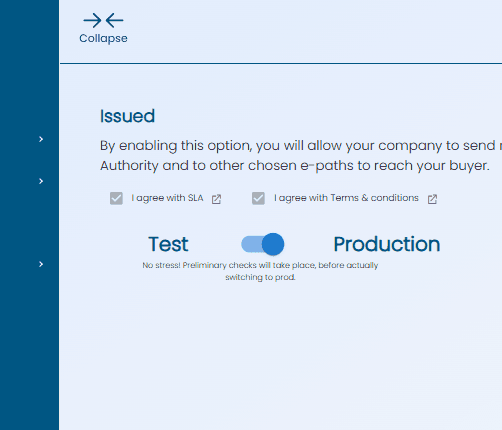
4/4 In the DDD Dashboard and go to Live/Test Mode.

Turn Issued Invoices from Test → Live. (No stress, preliminary check will take place, but do this only when you are ready to start issuing invoices to the tax portal!)
-1.png&w=1920&q=75)
The toggle should switch to the production and that's it! You are done!
DDD now runs automatically in the background. You can now start generating and distributing tax compliant documents via DDD Invoices from your Stripe transactions!
Once you collect a few, they should look like this in the DDD Invoices dashboard. Happy invoicing!

Before booking, make sure your Stripe account is fully verified & set-up.
_____________________________________
Written by the Compliance & Growth Team
Reviewed by Denis V. P.


DDD Invoices is an enterprise-grade platform delivering a powerful infrastructure for creating, sending, receiving and storing electronic documents. DDD Invoices enables software providers like ERPs, SaaS, eCommerce, POS systems, accounting & invoicing softwares, billing services and others, to easily adhere to global invoicing compliance requirements and shorten their time-to-market.